The power of React hooks (part 2)
Something which almost every app will need is a way to call data from an api and handle the response appropriately. For most of our projects at Gravitywell we use Axios, an async library for fetching and posting data. While the library is great the syntax gets a little lengthy and repetitive if we are requesting a lot of different endpoints. The custom hook will aim to solve this and give us a neat and efficient way to handle requests, loading, errors and the actual data we receive.
Custom hooks — best practices
As mentioned in part 1 one of the main concerns of hooks is that it’s not always clear how and where the functionality is happening, so naming it correctly helps people coming onto the project understand that it is a hook being used. The way to name the hook is useNAME where NAME describes the functionality of the hook. In this case we are going to call the hook “useAxios”.
When building a hook it’s also important to remember we can use the component state as if we are inside any component, but that state is isolated to that component. If you use the same hook in different components the state is not shared between them, they each get their own version of that state.
Initialising the hook
First, the hook is going to initialise a state object to keep track of the request using useState().

This gives us a request and response object in state to manipulate through out the request.
Making the request
useEffect() can then be used to actually make the request to our api using Axios.
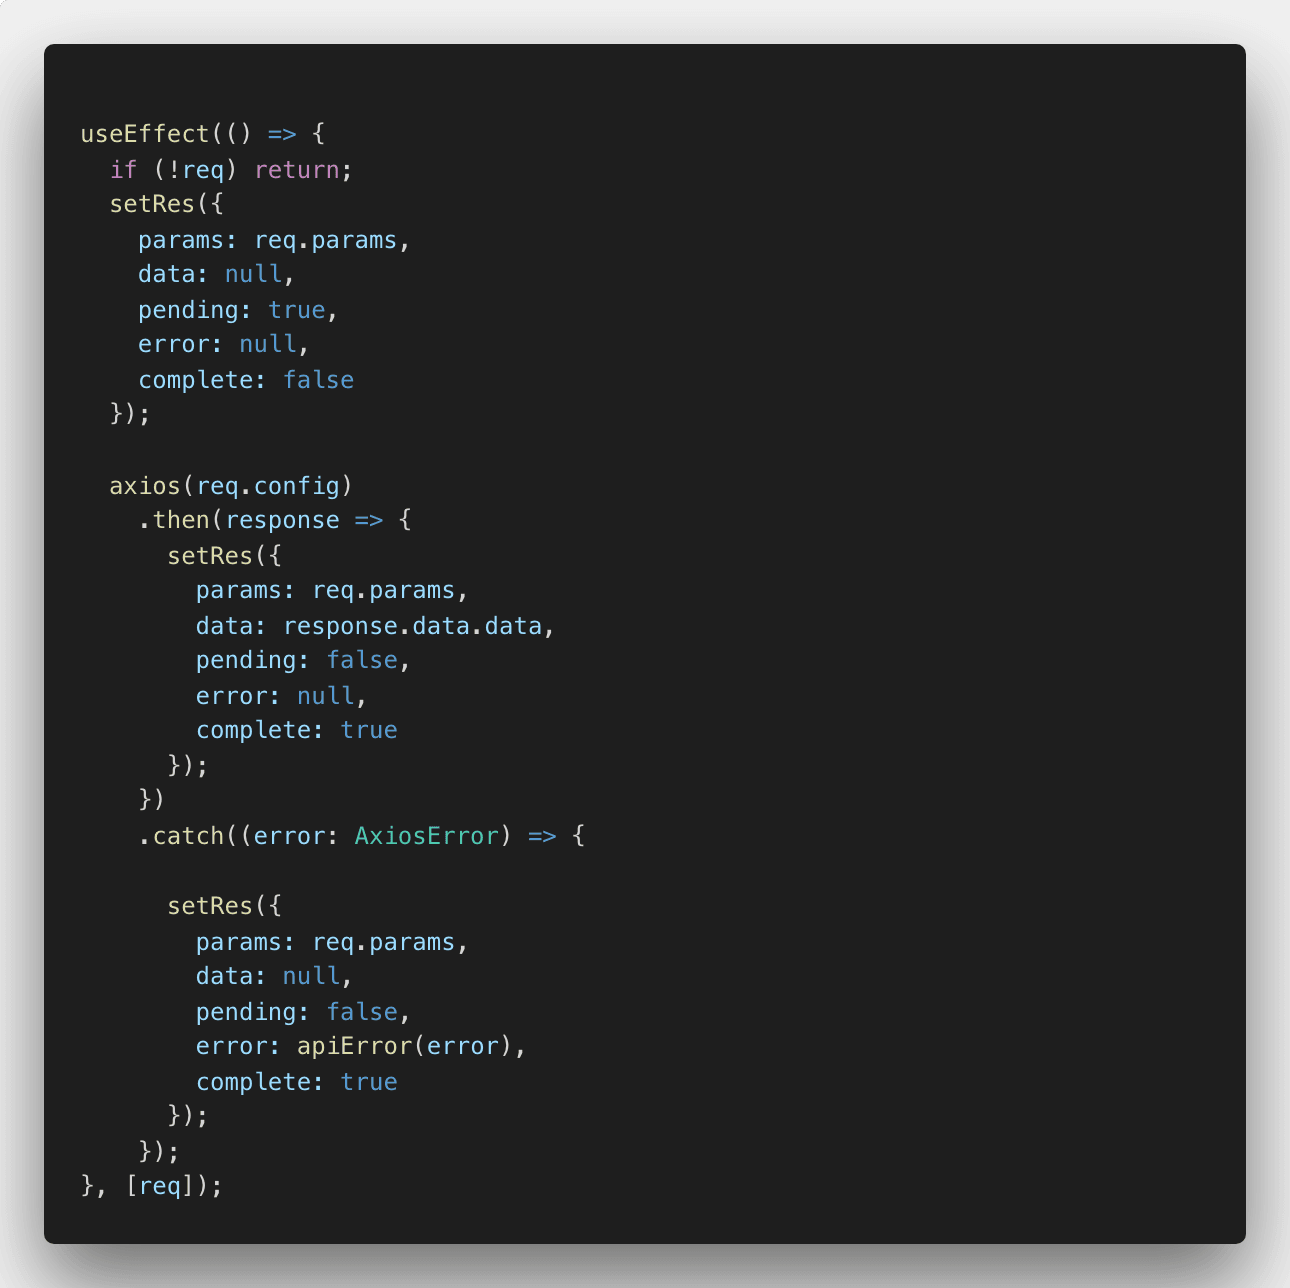
The hook runs every time the request updates meaning if our params did change for some reason mid way through it will update and make a new request. It initially sets pending to true, which will allow the component to know the request is in progress and therefore handle any loading status’.
Then we complete the request and return either the data or an error accordingly, whilst also setting complete to true, to we know the action has ran at least once and the of course pending back to false so any loading states can terminate.
Wrapping the logic
That’s the core logic of the request so now all we need to do is wrap that with all the right params and return logic.

We give the hook a parameter of a function that returns any Axios config object. This allows us to create wrapper functions for dynamically creating any Axios config we might have. It then returns the response object as the first item of the returned array and then a function to set the request as the second item.
Using the hook
As mentioned the this is set up allows a wrapper function to set the Axios config. So to use the hook we would do something like this:
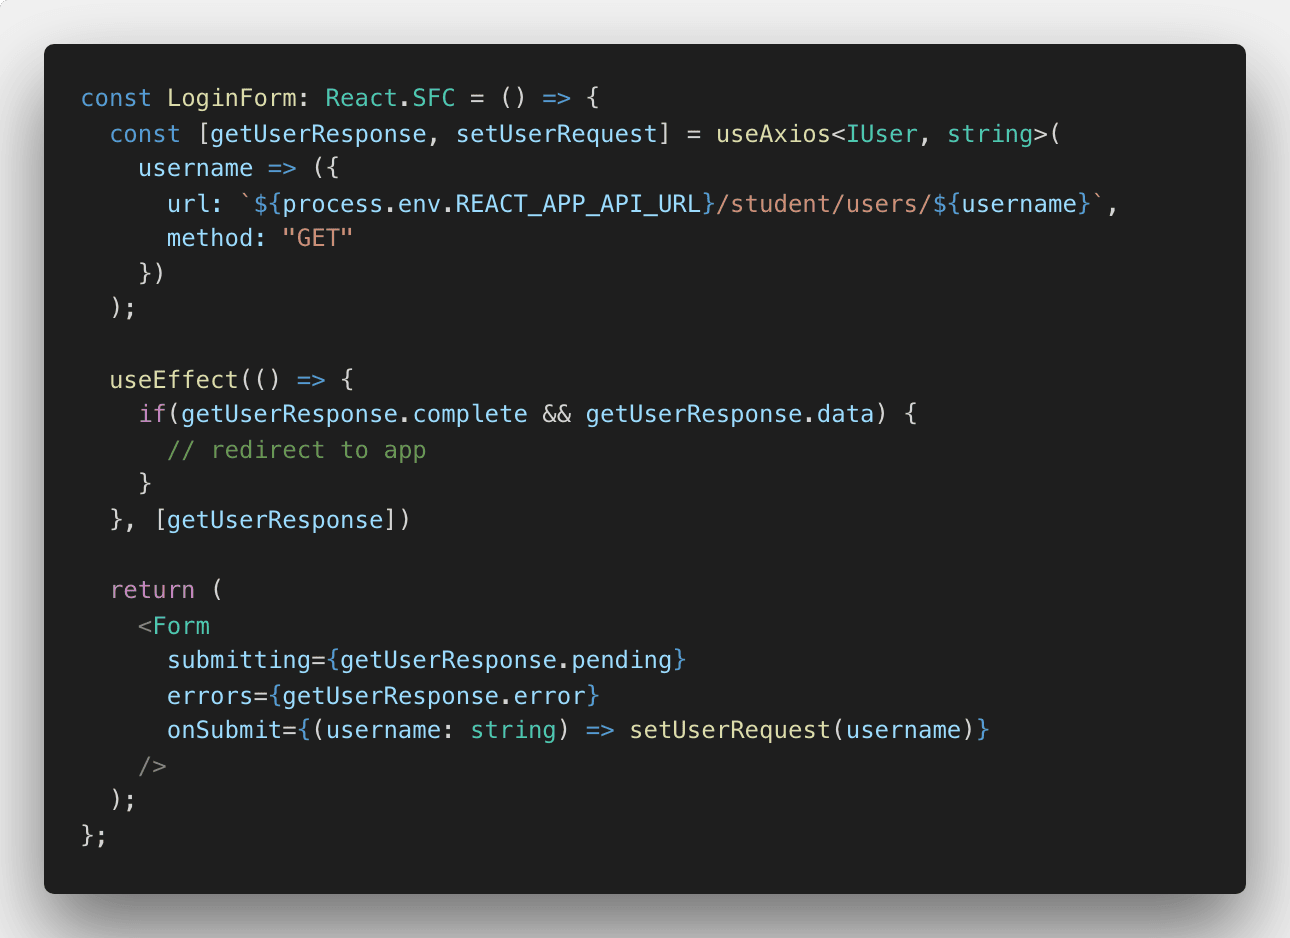
The form components props can now be completely dictated by the response objects properties. If it is pending the form will prevent the user from resubmitting. On submit it uses the username as a parameter to go and fetch data. Any errors are passed to the from component to deal with.
The component then uses its own useEffect() to handle a successful login using the complete and data properties from the response object.
And that’s it, we now have a reusable hook that accepts dynamic Axios config and returns an easy to use and consistent response object!