Building an Image Recognition App using Core ML
What is Core ML?
Core ML is Apple’s machine learning framework, released in 2017. It enabled a smoother integration of machine learning models into iOS mobile devices. Before that, integrating machine learning models on iOS required the use of third party libraries that often had compatibility issues and provided no optimisation options to the developer.
Core ML optimises machine learning models by running the model on CPU and GPU, changing between the two depending on the resources available.
How can we use Core ML?
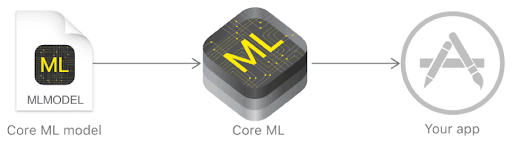
The model is required to be in a specific CoreML format. We can find available conversion scripts that allow models trained with libraries such as Keras, Caffe and Tensorflow to be converted to the desired format. In this tutorial, we will rely on a ready-to-use trained model downloaded from Apple’s machine learning website.
Download the Core ML model
Navigate to https://developer.apple.com/machine-learning/models/ and download the SqueezeNet.mlmodel.
Setting up the project
Import the Core ML model into the app
Easy peasy! Just drag the file and drop it into the project navigator.
.png)
Viewing model’s specifications
Click on the model to view its specifications. SqueezeNet model takes as an input an image of dimensions 227x227 and outputs:
- classLabelProbs: A dictionary containing all the possible predictions and their corresponding probability.
- classLabel: The prediction of the identified object.
So what’s next?
Let’s get started implementing the Real-time recognition.
The coreML model accepts a 227x227 input image as mentioned above. The plan is to capture real-time video using the device’s camera and process those video frames to images that match the requirements of the coreML model. Then, we only have to pass those images to our model and show the highest prediction!
Setting up a Capture Session
An AVCaptureSession is needed for all media capture in iOS. We will follow a few simple steps to set up a capture session that will use the back camera of our device.
- Create a new capture session using the AVCaptureSession constructor
- Create a capture device using AVCaptureDevice
- Create an input for the capture device
- Set the input to the capture session
- Start the capture session
We will add the code for all the above steps in viewDidLoad() of the viewController.
Remember: Give camera permission access by adding a field for “Privacy - Camera Usage Description” in your Info.plist file.
If we start the app now we will notice a white screen. In order to view the camera session, we will need to add it as a sublayer to our main view.

Processing video frames
In order to use the coreML model mentioned above, we need to process the input video’s frames into images that conform to the model, therefore 227x227 input images.
Steps:
- Set an output data object using AVCaptureVideoDataOutput()
- Use setSampleBufferDelegate() to set the sample buffer delegate and the queue for invoking callbacks.
When a new video sample buffer is captured, it is sent to the sample buffer delegate using captureOutput(_:didOutput:from:). Let’s add this function to access all captured frames.
Therefore, for every sample buffer we want to:
- First, initialise the model using VNCoreMLModel.
- Get the image buffer using CMSampleBufferGetImageBuffer.
- Perform a model request on every image buffer.
We then create a model request with VNCoreMLRequest to pass into VNImageRequestHandler. This will return a final request that contains all VNClassificationObservations. Let’s show the observation with the highest confidence.
If you check XCode’s terminal now you will see all of the results with the highest confidence.
.png)
Let’s add a label to the UIView to show the final result. At the top of the file define a UILabel named resultLabel.
Create a function for positioning the label onto the view, and add some constraints. Call that function at the end of viewLoad().
Instead of printing the result, set it as the text of resultLabel in DispatchQueue.
Let’s run the app now and see the results!

Not bad for this model! If we want more accurate results we can download any of the larger models available!